Video Generation Tool
The Video Generation Tool can be opened in both Results View (Image) and Results View (3D) (from menubar: Tools ⟶ Video Generation).
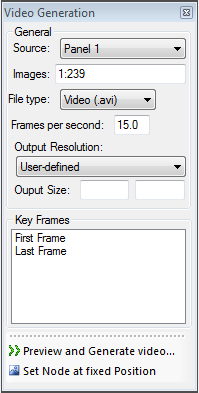
- First choose the source from which the video should be generated from. In Results View (Image) you can choose between View 1, View 2 and both combined. In Results View (3D), there is only one option.
- Specify which image indices should be included in the video. By default, all images are included.
- Specify the output type. Here, there are only two choices, an *.avi file or a series of bmp images.
- For *.avi files you need to specify a frame rate (Default = 15 Hz).
- Under “Output Resolution” and “Output Size”, you may optionally give some input, both to make a video with a specific aspect and/or reduce the resolution of the images in the video.
- In the “Key Frames” listbox, select “First Frame”, right-click and choose “Define video rectangle”. (You dont have to do this if you specified both views in the first step) An action called “Define square region for video generation” will be active in the chosen view.
- Click and drag in the view to define a rectangle of which the video should get images from. Accept the action by pressing the green “V” in the action bar.
- Click “Preview and Generate Video...”
A dialog will appear like this:
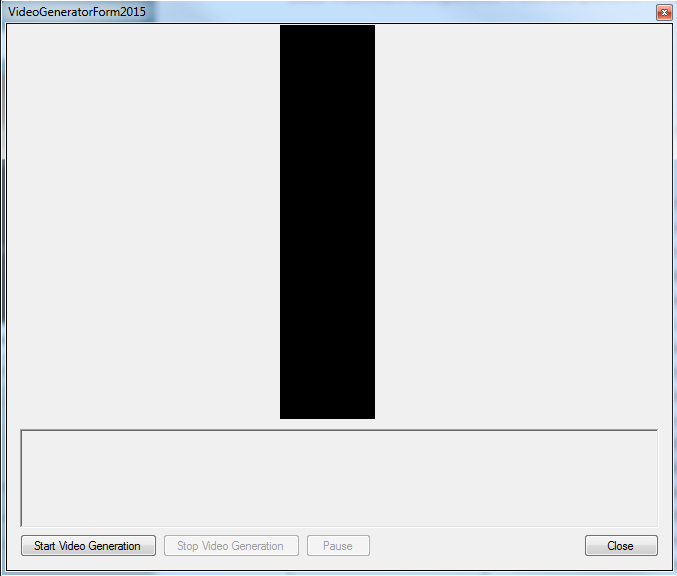
- To start generating a video click “Start Video Generation”. This may take a while depending on the number of images included in the video.
Videos generated using this tool will in general be very large, as there are no compression of the data in the avi file. The avi-file videos may however be converted to e.g. compressed mp4 files using the Video Encoder Tool (from menubar: Tools ⟶ Video Encoder).