 Using the Instrument Setup WizardUsing the Instrument Setup Wizard
The Instrument Setup Wizard is used to synchronize the instruments and PC’s date and time, update module software, change the instrument's touch screen language, reset the instrument's parameters, and configure the instrument's network settings.
The Instrument Setup Wizard can be accessed either by selecting Tools/Instrument Setup from the main menu or through TA Instrument Explorer by right clicking on the instrument icon and selecting Instrument Setup from the pop-up menu.
Select from the following topics for more information:
Installing font and PCX files (Not applicable to Platinum/QNX Instruments)

Select Tools/Instrument Setup from the main menu to start the Instrument Setup Wizard.
Click the Next button until the window Set Instrument Date, Time and Language is displayed. The current date and time of both the PC and the instrument are now displayed along with the current language displayed by the instrument.
If the current date and time of the PC is incorrect, click the Adjust button. The system Date\Time window will now be displayed, make the necessary changes, then click OK.
Click the Synchronize button to make the Current PC Time match the Current Instrument Time.
Select the desired language from the drop-down Select Language list, then click the Set button. A message will be displayed after the language has been successfully changed. Select OK. The instrument control software will automatically close.
If the language
you want is not displayed (English, German, Japanese, and Chinese are
available), you need to download the language file. For information click
here ![]() Updating
Software and Downloading a Language. Once the new language has been
downloaded, the selected language will be automatically displayed once
the instrument has been rebooted.
Updating
Software and Downloading a Language. Once the new language has been
downloaded, the selected language will be automatically displayed once
the instrument has been rebooted.
Click the Cancel button to exit the wizard or select Next to advance to the Transfer Program Files window, which is used to update the instrument software. See Updating Software and Downloading a Language for more information.
Verify that both the instrument and the controller are both powered on and connected to the supplied Ethernet Hub or LAN.
Select Tools/Instrument Setup from the main menu. The Instrument Setup Wizard will now start.
Click the Next button until the window Transfer Program Files to the Instrument is displayed.
Verify the instrument software path by clicking the Browse button to the right of the Update Module Software field. Select the appropriate directory where the instrument software files are located. The default directory is Program Files\TA Instruments\Thermal Advantage\Qseries\InstrumentSW\[instrument].
After the proper Module Software directory has been selected, click the Send Font Files button.
Select Show Font or PCX
Files from the drop-down menu then check the box to Select
All Files or individually select the files you want send to the
instrument. 
Click the Send button to begin downloading the files to the instrument. The file downloading process will now begin and the status can be viewed via a progress bar. The file downloading process is complete when all of the selected files are unchecked. Select the Close button to close the file transfer window.
Select the Cancel button to exit the wizard or select Next to advance to the Instrument Settings window, which is used to reset the instrument parameters.
After you have exited the Instrument Setup Wizard, press the Reset button on the back of the instrument to complete this process.
You can reset the instrument back to the original factory default settings, if desired. This function should be used after installing new instrument software or when it appears that the instrument is not properly responding to commands being sent from the controller.
List of Reset Parameters: After downloading instrument software or resetting parameters, the following parameters are reset to the default settings (many of these items are part of Instrument Preferences):
Purge gas selections
Touch screen signal display selections (LCD signals)
Touch screen screen saver and delay
DSC cooler selections
DSC Heat flow selection
DSC exotherm direction
TGA weight range
TGA taring offsets
Autosampler stop options
Autosampler error handling options
Run sequence is reset to New
Advance parameters
Post test parameters
Purge flow rate(s) are set to zero mL/min
Instrument log is cleared.
Method is cleared
In addition, the following calibration parameters are lost:
Probe Calibration for TMA
Clamp Calibration for DMA
To reset the instrument parameters:
Verify that both the instrument and the controller are both powered on and connected to the supplied Ethernet Hub or LAN.
Double click on the instrument icon in the TA Instrument Explorer window to start the instrument control program. Select Tools/Instrument Setup from the main menu to start the Instrument Setup Wizard.
Click the Next button until the Transfer Program Files to the Instrument window is displayed.
Click the Reset Parameters button. The following warning message is then posted asking if you wish to continue with the resetting the parameters, click OK to proceed. The parameters will now be reset.

When the reset parameters function has been successfully completed, the instrument will display one of the messages below on the controller/touch screen depending on the configuration of your instrument.
If your instrument is equipped
with Platinum/QNX features, the following message is displayed and the
instrument will automatically close the instrument control software and
restart the instrument. 
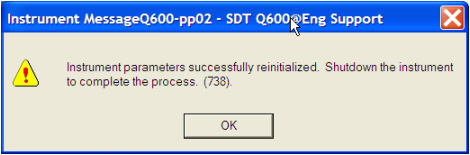
If you have the original Q Series instruments, you will see the following message. Shutdown the instrument then press the Reset button to complete the process. See Shutting Down the Instrument for detailed information. (If no message is posted, wait 20 seconds then press the Reset button.)
Select the Cancel button to exit the window after confirming the message.
Verify that all of the reset parameter settings listed above have the correct selections/values. Change the settings as required.
CAUTION: If the cooler type is RCS or LNCS, verify/set the following: (1) Cooler type (selected on the Tools/Instrument Preferences/Cooler page), (2) Purge gas settings and flow rates (see Purge Gases and Flow Rates), and (3) Post-Test conditions (see Entering Post Test Options). (4) Then select Control/Go to Standby Temp from the Control menu to invoke the standby temperature set on the Instrument Preferences/DSC Page so that the DSC is maintained above ambient temperature.
NOTE: This operation has no effect on your saved calibrations, except where noted as a reset parameter setting.
The Instrument Settings window displays the instrument serial number and also allows the user to specify a 14-character name and location for the instrument. This window is also used to configure the instruments' network settings that include the IP (Internet Protocol) address, Net Mask, and Gateway.
These settings can be changed from the Instrument Control software or using the instrument's touch screen (for instruments with Platinum/QNX only). Choose from one of the following topics:
Using the Touch Screen to Change Instrument Settings (Platinum/QNX instruments only.)
To make changes to the instrument network settings follow these steps:
Select Tools/Instrument Setup from the main menu to start the Instrument Setup Wizard.
Click the
Next button until
the Instrument Settings
window is displayed. The default IP Address and Net Mask are displayed
in the window shown below.
Enter a Name and Location for the instrument. The Location field is also used by the Q Series™ Explorer to sort instruments by their location.
Enter a new IP Address, Net Mask,or Gateway, if desired.
Click the Apply New Settings button to save the changes. The following warning box will be posted. Click Yes to proceed with the new settings, if desired.
Click Finish to exit the wizard.
To make changes to the instrument's network settings follow these steps:
Choose the Display button on the instrument touch screen. Then select the Information button.
Click the Change Net button. The IP settings will be selected by default.
Click on the # button under the field you wish to change. A new window will appear that allows you to enter a new value.
Select the CLR button, and then enter the desired value. When finished select Enter. Repeat process for each field. When you have finished entering the new values select Apply.
If you wish to change the Netmask settings as well, select the Netmask button, and repeat steps 3 & 4 to change the values.
When you have finished changing the network settings, select the Control button and shutdown the instrument to apply the new settings. See also: Shutting Down the Instrument.
NOTE: The Gateway settings can only be changed through the instrument control software. See Using Instrument Control to Change Instrument Settings
![]()